The Abyssinia Campaign: The Battle of Tug Argan and the Fall of Somaliland

When Mussolini declared war on France and Great Britain in June of 1940, he had grandiose dreams of a New Roman Empire, particularly in Africa centered on his two colonies, Libya and Abyssinia (Ethiopia). The Italians in Africa had an enormous material and troop advantage over the Allies, 415,000 to 36,000, and Mussolini planned to use it to seize Egypt, Sudan, Somaliland, Kenya, and the rest of East Africa. The entrance of Italy into the Second World War shifted the entire center of gravity for Great Britain and the Commonwealth. The Middle East was Great Britain’s Achilles’s Heel, because all of its oil and shipping passed through the Red Sea and Suez Canal or down the African coast. And despite the furious air battles fought over southern England and the spectre of invasion, Churchill sent all available troops from India and the Commonwealth, not to the British Isles, but to East Africa and the Middle East. But before the British could build up, the Duke of Aosta, Mussolini’s competent and level headed Viceroy of Ethiopia, struck first.


The Allied plan in East Africa always depended on the British massing in Egypt while holding in the Sudan, Kenya, and Somaliland. The plan relied on the French in Djibouti, the lion’s share of the Allied strength in the theatre, to counterattack any Italian advance. But the fall of France in mid-July made the French a non-factor when a pro-German Vichy French commander took over in Djibouti. In early August 1940, Italian units in Ethiopia attacked into Sudan, Kenya, and Somaliland. In the Sudan and Kenya, the Italians stalled because they overestimated the enormous logistic difficulties of operating in the wildernesses that existed on Ethiopia’s borders: the open desert of Sudan, and the 400 miles of scrub desert separating the habitable areas of Kenya and Ethiopia.


British Somaliland was a different story. The terrain was hilly, rugged, and rough, but passable, and the British had too few troops to defend it. The initial surge of Churchill’s reinforcements went to General Wavell in the Egypt where he had to deal with pro-German governments of Syria, Iraq, and Iran, and Italians massing in Libya. But Churchill wanted to avoid an Italian victory in the news (not to mention an Italian/German naval base next to the Red Sea) so he ordered some units to Somaliland once it became obvious Aosta was going to invade. It was too little too late.


The eclectic British led force in Somaliland consisted of Punjabis, Rhodesians, Free French, British regulars of the Black Watch, West Africans, East Africans, Singaporeans, part of the Hong Kong garrison, and native Somalis of the Camel Corps. Their defense was planned, supplied, and coordinated on the fly along a series of ridges south of the port of Berbera. The defenses focused on the “tugs” or wadis (dry streambeds) along the hills through which vehicles could travel. However, the Italians grossly overestimated the British forces due a simple deception plan (driving around to stir up dust to give impression of more movement) and a lack of reconnaissance due to bad maps, bad aircraft maintenance, good British camouflage discipline, and the counter reconnaissance efforts of the Somali Camel Corps.


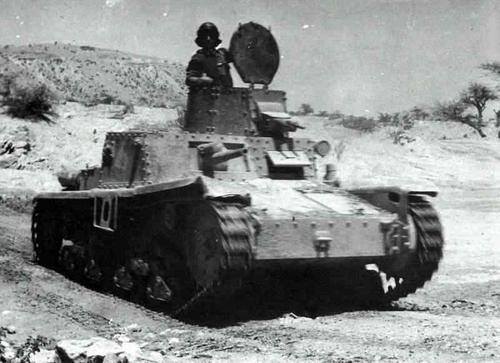
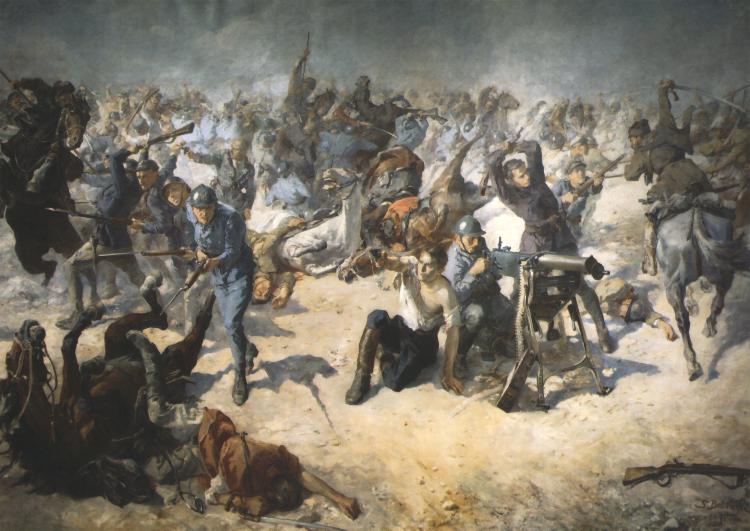
Nevertheless, imagined troops are still in the end, imagined. Italians were just too many. Additionally, many units of the Italian Royal Corps of Colonial Troops were tough and experienced after years of fighting Ethiopian guerillas, and the best struck at the Tug Argan. Tough Eritrean and Somali askaris (native soldiers), backed by motorized regular Italian troops, Fascist Blackshirt battalions, and medium and light tanks and armored cars. The defenders of Tug Argan made a fight of it but the lack of anti-tank guns, long defense line, and the piecemeal deployment of the defenders (their deployment was determined by when they offloaded the ships) made the battle a foregone conclusion. However, they were saved from complete encirclement and destruction by a desperate fighting withdrawal by the Somali Camel Corps. The British re-embarked the ships they just disembarked a week before, the Camel Corps disbanded and melted back into the population (we shall hear of them again later), and the British departed Berbera which fell to the Italians on 21 August 1940.


While the Duke of Aosta focused on the coast, Mussolini toasted his new empire, and the world assumed the war was being won by the Axis, three very different men, with three very different views on warfare, arrived in the Sudan: the unpretentious but supremely competent Brigadier William Slim, the brilliant but eccentric Major Orde Wingate, and a certain “Mr. Strong”, who departed London in a flying boat a week before the fall of Berbera. “Mr. Strong” was the Lion of Judah, the Ras Tafari, the former Emperor of Ethiopia, Haile Selassie, come to liberate his people.


The Fall of British Somaliland meant that Red Sea was considered a “war zone” and neutral American ships carrying vital supplies purchased by the British could not enter. Supplies for Wavell’s forces in Egypt had to come via the Persian Gulf and Basra Iraq, and then trucked to Cairo and Alexandria, an unsatisfactory situation to say the least. The loss at Tug Argan unleashed a flurry of activity to plan, prepare and execute the mind numbingly complex and perilously ad hoc liberation of the Horn of Africa from the Italians before the fall of the Suez Canal and the oil rich Middle East to Germans, Italians, and Soviets.

The Pennsylvania Oil Rush

In the 1850s, the Industrial Revolution was moving forward steadily in the United States, but in Europe, which at the time was technologically about 30 years ahead, it was beginning to slow. The Industrial Revolution was tied to coal, and in 1850s Europe, coal was starting to reach the limits of its commercial viability. Mining coal was (and is) a labor intensive process, and the mines couldn’t keep up with the demand. A new and cheaper energy source was needed.


Everyone knew that energy source was oil, but there was no efficient method of extracting it. The only practical way of harvesting oil was whale fat, and tens of thousands of innocent whales were being slaughtered each year. However, while whale oil was good for lamps, it was not economically viable for industrialization. In 1850, there were only a few places on the planet where oil was known to exist in the ground.


One of those places was Baby Jesus’ Chosen Land and America’s Keystone State: The Grand Commonwealth of Pennsylvania. In the picturesque glens, moraines, and dales of glacier formed Central and Western PA, there had always existed “oil seeps”. For hundreds of years, its former Amerindian inhabitants, the Iroquois and their subject peoples after them, and the hardy Scots-Irish and German immigrants who followed them, knew of this phenomenon. But, they avoided those areas because the hunting or farming was horrible, and not practical.


Enter entrepreneur Colonel Edwin Drake, and his blacksmith assistant, Billy Smith. They formed the Seneca Oil Company in 1858, and were determined to prove that “rock oil” was profitably extractable. With an old steam engine and a drill used for salt mining, they moved to Pennsylvania in search of commercially viable amounts of Mother Nature’s Sweet Sweet Nectar of Civilization. On 27 August, 1859, just outside the town of Titusville, in beautiful and bountiful Pennsylvania, Drake and Smith struck oil. Their discovery (g)ushered (Ha!) in the world’s first oil boom.


Pennsylvania’s Oil Boom first fueled the continuation of Europe’s Industrial Revolution, and within a few years it pushed America’s own Industrial Revolution into high gear. It supercharged the growth and expansion of the railroad industry, which massively expanded, replacing turnpikes and canals, and connected the West with antebellum East. The boom turned Pittsburgh from the center of America’s glass making industry to America’s Beating Industrial Heart.


One can easily argue that late Modern America started 161 years ago today. Thank you Pennsylvania, in particular your sons Messrs. Drake and Smith, for being a net exporter of energy, and laying the economic foundations necessary to free the slaves, defeat the Confederates, save the whales, advance Western Civilization and human rights, defeat the Nazis and Communists, raise countless billions out of poverty, and like a cherry on top, enjoy Sunday Steelers’ Football.

Introducing Connery, Sean Connery

In the late 50s, vicious mob boss Johnny Stompanato owned L.A., and by extension, Hollywood. The stage crew, writers, and actors’ unions were all under his “protection”. He also owned the studios. He made sure the workers showed up on time and didn’t strike, and the studios “loaned” him money, which of course he never had to repay. The Greater Los Angeles’ Metropolitan Area was Stompanato’s personal fiefdom.


Actress Lana Turner was trying to resurrect her career and turned to a relationship with Stompanato, but it was far from ideal. In March 1957, Turner was filming “Another Time, Another Place” with unknown 27 year old British actor, former Mr. Universe contestant, Royal Navy vet, Scottish patriot, and male sexbot template, Sean Connery (OK, I made the last one up. It’s just not true…yet).


Stompanato, being the jealous type, wasn’t happy that Connery was poking Lana Turner (because of course he was), so one day he decided to intimidate him. Stompanato showed up on set waving a revolver around and started yelling at Connery. Connery, unimpressed, disarmed his adversary, pistol whipped Stompanato with his own gun, and beat him to a bloody pulp right there on the set.


Sean Connery just gave a beating to the most powerful and ruthless man on the West Coast. There could be only one result: Sean Connery had to die.


On 4 April 1958, Stomapanato vowed to sneak into Connery’s hotel and murder him, as he had done to others a dozen times before. He was just waiting for dark. But that evening, Lana Turner came home from filming, and Stompanato proceeded to beat her, as he was wont to do. The beating was so vicious, that Turner’s 12 year old daughter, Cheryl, ran into the kitchen, grabbed a knife, and stabbed Stompanato… 12 times, killing him.
Another Time, Another Place released in June and featured credits with “Introducing Sean Connery” as opposed to “Dedicated to…”

Almost exactly three years later, archetypical English gentleman and actor David Niven, by far the favorite, lost the spot for the new role of James Bond to his only real competition: a still nearly unknown Sean Connery.

The Big Kahuna: Duke Kahanamoku

Duke Kahanamoku was born on 24 August 1890 in Honolulu in the Kingdom of Hawaii. Duke Kahanamoku was an Olympic swimming champion, Hollywood actor, lifelong friend and confidant of John Wayne (the “Other Duke”), and the Father of Surfing. Duke Kahanamoku won the gold 1912 Olympics for the 100m freestyle and a silver in the relay, two gold medals in the 1920 Olympics, and a silver in the 1924 Olympics at the age of 31. “The Big Kahuna” is best known for popularizing the Hawaiian traditional wooden “long board” or heavy board, and his amazing rescue of the crew and passengers of a sinking yacht off of Corona Del Mar in 1925.

“Lightning in the Night”

At the height of the Battle of Britain and 16 months before America’s entry into the war, Liberty Magazine, a pop culture general interest weekly out of New York published the prologue of Fred Allhof’s alt-history pulp fiction “Lightning of the Night”. Like other alt-history greats, such as the “The Third World War”, “Red Storm Rising” and “Ghost Fleet”, “Lightning in the Night” was written with the advice and input of leading military and civilian experts of the time, including Lieutenant General Robert Lee Bullard, the first commander of the 1st Infantry Division, who led the Big Red One at the Battle of Cantigny.


Set after the Nazi victory over Europe, “Lightning in the Night” was the story of the German invasion of North America. The prologue began with a surprise air attack on Pearl Harbor…

The Battle of Britain: Airfields

Towards the end of August, 1940, the Luftwaffe High Command realized that they were not shooting down enough British planes. In order to destroy the fighters, or at least force them away from the southern coast, the Germans needed to focus their attacks on fighter specific targets to compound the damage they were already doing in the air. On 23 August 1940, Herman Goring ordered the Luftwaffe to focus on RAF Fighter Command’s airfields of Air Vice Marshal Keith Park’s 11 Group.

11 Group covered Southern England and already bore the brunt of the Luftwaffe’s attacks. Goring’s new focus was devastatingly effective. Park’s airfields were smashed, and although heroic efforts were made to keep them open, aircraft, and more importantly, pilot availability was affected. On paper, the RAF had more assigned fighter pilots than the Luftwaffe, but the attacks on the airfields prevented the critical “battlefield calculus” from occurring: An experienced and awake pilot + a workable plane + enough fuel + loaded ammunition + a flat runway + an id’d target + time to reach it + a place to do it from all over again a few hours later = victory. The Luftwaffe was making that more difficult everyday. And only Herculean efforts by ground and maintenance crew were keeping British fighter pilots in the air.

Furthermore, as Park’s fighter squadrons were intercepting raids, his airfields were supposed to be protected by 12 Group’s fighters from the north, under AVM Leigh-Mallory. But Leigh-Mallory’s tactics were ineffective, and his squadrons routinely missed the Luftwaffe. Whereas 11 Group attacked raids quickly with a single squadron, 12 Group formed “Big Wings” of three or more squadrons, ostensibly to do more damage i.e. the principle of mass. Theoretically, it should work. But the Big Wings took too much time to form up, thereby becoming the classic “exception that proves the rule“ for the principle of mass, in other words “It’s not mass if it isn’t there”.

Finally, the Luftwaffe attacks unknowingly had a great effect on Air Marshal Dowding’s early warning system. One of the two critical vulnerabilities of the system, the Sector Control Centers, were only located on airfields for administrative convenience. (The other CV was the infamous “Filter Room”.) The Sector Control Centers were responsible for communicating directly with the squadrons, and they were smashed along with the airfields. Many RAF squadrons in late August and early September wasted their time flying around looking for the raids when the SCCs couldn’t direct them to one.

In early September, the pilot situation became critical. Shortfalls were made up by dragooning Fleet Air Arm and Coastal Command pilots, in addition to pilots from Canada, Australia, Rhodesia, South Africa, New Zealand, Belgium, France, Poland, Czechoslovakia, and even a Jewish pilot from Mandate Palestine. But even cutting pilot training hours down to the bare minimum could not produce enough available pilots. At the height of the crisis, British Secretary of State for Air, Sr Archibald Sinclair noted, the RAF had “only 350 pilots to scramble, of which nearly 100 were Poles.”

On 5 September, Dowding had to confront the serious possibility that they needed to pull 11 Group north of London to put their airfields out of the range of the Luftwaffe bombers, or they wouldn’t have enough fighters left to repel any invasion. This would effectively cede the English Channel to the Germans. He planned to brief Churchill on the 8th.

The Battle of Bosworth Field

For thirty years in the late 15th century, the War of the Roses raged across England and Wales (The War of the Roses was the real Game of Thrones). By 1483, the House of York, whose symbol was a white rose, had forced the remaining members declared for the House of Lancaster, the red rose, to flee to France. But internal politics had forced the regency council to declare the 12 year old Yorkist King Edward V illegitimate, and Henry, of the small House of Tudor and the last remaining Lancastrian lord, took the opportunity to invade.

Henry Tudor landed in Wales in early August 1485. Henry gathered troops from former Lancastrian allies, and met the forces of the House of York under King Richard III outside of the village of Bosworth. (Richard took the throne after Edward V and is the guy whose remains they discovered underneath a parking lot in Leicester in 2015) Richard III vastly outnumbered Henry Tudor and he divided his army into three “battles”: one commanded by himself, one under the Duke of Norfolk, one under Earl of Northumbria. A fourth force was on the field under Lord Thomas Stanley, Earl of Derby, ostensibly fighting for Richard. Henry kept his small army together under the Earl of Oxford.

Richard III ordered all of the battles to attack, but only his and Norfolk’s actually did. The Earl of Oxford held off the attacks and even forced some of Richard’s forces to retreat. Richard asked Northumbria for assistance but the Earl’s battle did not move. Henry, seeing the two immobile battles of Stanley and Northumbria, correctly surmised that they were waiting to see who won in the center before throwing in their support.

Henry saw an opportunity to win the battle and moved off to directly appeal to Stanley. Richard III saw Henry move toward Stanley and realized that the only way to win the battle was to kill Henry. So he personally charged. The bodyguards of the two commanders fought and Henry was almost killed. But when Sir William Stanley (the Earl of Derby’s nephew?) saw that Richard was isolated from the rest of his army, he and his men charged. Richard III slighted William Stanley years before and chose this moment for revenge. The combined weight of Henry’s bodyguard and Stanley’s knights overwhelmed Richard and his retinue, whom were slaughtered to a man. Unhorsed, Richard III fought to the death.

Henry Tudor was crowned on the field and the War of the Roses was over. The House of Tudor claimed prominence in England and King Henry VII would reign for 25 years. He was succeeded by his son Henry VIII (I am I am; the one with the wives), and his granddaughters Queen “Bloody” Mary I and Queen Elizabeth I.

The Great Siege of Malta: The Assaults

After the fall of Fort Saint Elmo at the end of June 1565, the Turks maintained a constant bombardment and launched a series of joint landward and seaward attacks against the Maltese Knights’ main defenses of the town of Birgu, Fort St. Michel, and Fort St. Angelo.

The attacks were devastating but uncoordinated due to the death of the most competent leader, the Ottoman corsair admiral Dragut Reis who was killed by an errant cannonball during the final assault on Fort St. Elmo. The other two Ottoman commanders, Mustapha Pasha and Piali Pasha, despised each other, and their various schemes undermined the efficient and effective use of the Ottomans’ remaining resources, after losing 1/4th their force at St. Elmo. Nonetheless, they still had 30,000 troops and complete command of the harbor.

The Knights held through these attacks, but only by the slimmest of margins. Many of La Vallette’s subordinates wanted to trade fortifications for time, but La Vallette disagreed. He knew the only wany to defeat the Turks will to fight was to fight for every inch of the defense. Every Turkish assault that was thrown back degraded the Turkish will to continue, and more importantly, delayed the next Turkish assault, as they reorganized.

In the beginning of July, the Turks launched a surprise amphibious attack against the seaward side of the Senglea Peninsula, combined with a landward attack on Fort St. Michel. St Michel was exposed on its harbor side due to the fall of St Elmo, but an enterprising older French knight, Chevalier de Gurial, on his own volition, ordered a battery from the wall of St. Angelo to the shore. The battery waited until the Turks were within 200m before firing and their grapeshot and chainshot killed almost a thousand elite Janissaries. Fort St. Michel would have almost certainly fallen without the actions of de Gurial’s battery, and it allowed the Knights the time to build a palisade along the shore to protect against future attacks.

At the beginning of August, Fort St. Michel was again the focal point of a massive Turkish assault after a mine was exploded underneath one of the bastions creating a breach. The Turks stormed the fort and through sheer numbers forced the remaining defenders back to the chapel. As they were about to be overwhelmed, the Turks inexplicably (to the chapel defenders) fell back in disarray. A raid from the small outpost of Maltese Knights at Mdina, in the center of the island, which was never captured by the Turks, attacked the undefended Turkish camp and gave the impression that the relief army from Sicily had arrived, prompting the Turkish retreat. The Knights and Maltese engineers and citizens immediately repaired the breach and filled the mine. In mid-August, another mine detonated opening a breach in the Birgu wall and the Turks flooded into the town. La Vallette ordered the guns of St Angelo to fire on the town while the 70 year old commander personally led the counterattack to the breach. Despite fierce fighting and many irreplaceable defenders lost to both the Turks and “friendly” cannon, La Vallette and his body guard fought their way to and held the breach as the citizens of Birgu filled it in. An Italian mercenary wrote of La Vallette,

“de Valette was told the Turks were within the walls; the Grand Master ran to the threatened post where his presence worked wonders. Sword in hand, he remained at the most dangerous place until the Turks retired”.

After the failure of the mines, Mustapha placed his faith in two giant siege towers. On 18 August, he attacked the wall of Birgu again but this time with a great siege tower filled snipers which cleared the top of the wall. But as the tower slowly lumbered forward, La Vallette ordered the base of the wall hollowed out. As the tower neared, laborers removed the few remaining stone blocks, and two cannon were pushed forward. They fired chain shot point blank into the base of the tower, toppling it. The second tower’s base was hastily reinforced against the repeat of the same tactic but as it approached the Maltese removed the blocks and instead of cannon, Knights streamed out and stormed the tower, eventually capturing it.

The tower attacks were Mustapha’s last serious attempts to seize the forts. La Vallette maintained that the Turks were losing will after the repeated failed even though the cost to the defenders was dear. La Vallette was right. On 28 August he moved his army to the small outpost of Mdina, where there was a water source so they could winter there. But as they approached, the few knights and Maltese citizens fired all of their cannon recklessly, using up all of their powder. Mustapha thought this meant they had powder to spare, and having none of his own, fell back to his camp near the harbor. Out of gunpowder, and nowhere to winter on the island, the Turks launched one final assault on 1 September, which was beaten back with heavy losses.

On 7 September Don Garcia of Sicliy landed in St Paul’s Bay on the north side of the island with a relief army. Mustapha took the Turkish army to the southern shore and boarded his galleys the next day. The Siege of Malta was over and the fragmented and petty kingdoms of the “soft underbelly of Europe” were safe from Islamic conquest. The Maltese would rebuild the capital of their island and name it Valletta, after the indomitable Jean Pairsot de Vallette, Grand Master of the Order of St John and Defender of Malta.

Operation Starlite: Battle of Van Tuong

In March 1965, the first US Marines landed in South Vietnam to protect US airbases as they supported the South Vietnamese Army’s fight against the Viet Cong and North Vietnam. On 15 August, the Marines learned that the 1st VC Main Force Regiment occupied the village of Van Tuong outside the Chu Lai Airbase on the South Vietnamese coast. In only two days (!?!?!) the Third Marine Division staff planned a joint combined arms hammer and anvil operation in complete secrecy to prevent VC infiltrators in the ARVN from tipping off the regiment about the attack.

On the morning of 18 August, the 3rd Battalion, 3rd Marine Regiment stormed ashore near Van Tuong in LTVPs launched from the landing ship USS Iwo Jima in the first contested amphibious assault since Inchon 15 years before. They were followed by 3/7 Marines. They were the “hammer” while the 2/4 Marines was the “anvil”. 2/4 was air assaulted into three landing zones west of the village by a company of Sikorsky S-58DT helicopters (you know: Riptide). The final battalion in the assault, 1/7, was reinforced with a company of M48 Patton tanks and secured the resupply convoys from the south.

The VC were completely surprised, but the Marines unknowingly played directly into their hands. The landing force did not have enough amtracs for more than one company at a time, so it was fed piecemeal into the fight for the small hamlets south of the village. Also, the far southern landing zone was only 400m from the communist Regimental HQ, was overlooked by the key piece of terrain in the area, Hill 43, and nearly overrun. Finally, one of the supply columns moved before the operation matured, and was promptly ambushed and surrounded. All three general actions (hamlets near beaches, the helicopter LZ’s, and convoy) were not coordinated effectively, and the operation was consumed in trying to desperately and disparately relieve each one simultaneously. Nonetheless, after heavy fighting, the battle was finally sorted out by nightfall: the Marines cleared the village and had the VC regiment surrounded.

Unfortunately, the Marines’ unfamiliarity with the terrain and distractions caused by severe thirst allowed the VC to exfiltrate that night. The Marines suffered 50 killed and 200 wounded, and the Viet Cong suffered about 600 killed. Operation Starlite, or the Battle of Van Tuong, was the first unilateral American ground offensive operation of the Vietnam War.

The Battle of Zadwórze: “The Polish Thermopylae”

During the Polish-Soviet War immediately following the First World War, Marshal Pilsudski stripped the Southern Front in the Ukraine of many Polish units to prepare for the upcoming Battle of Warsaw. In mid-August, 1920, the Communists of Semyon Budyonny’s 1st Cavalry Army broke through the front and threatened the Polish city of Lwów (now part of the Ukraine). The remaining Polish forces of the Southern Front streamed back to Lwów to hold the city.

On 18 August, 1920, 500 mounted Polish volunteers from Lwow under Captain Bolesław Zajączkowski were sent to reinforce the Polish soldiers that were withdrawing in the face of Budyonny’s 1st Cavalry Army, known simply as the “Konarmiya” or “Horse Army”. As they approached the village of Zadwórze, they received fire; the unit they were looking for was destroyed there the day before. The victorious Communists were the lead elements of the Red 6th Cavalry Division and were happy to see more Poles to kill before they resumed their advance.

Before the Communists could form, Zajączkowski ordered his men on line, and charged the village. They took the train station, but could not seize the entirety of the village. The village of Zadwórze became a vortex for the Red Cavalry, as the Communists committed more and more of the division to break the Polish resistance at the train station. Zajączkowski’s men fought off six successive cavalry charges from their stronghold in the station over the next six hours, while continuing to fight for the rest of the village. With dusk fast approaching and ammunition dangerously low, Zajączkowski ordered what remained his command to fall back to Lwów.

On the way out of the village, Zajączkowski’s men were strafed and bombed by three Communist airplanes, which broke up his formation. Zajączkowski gathered what men he could, and made a last stand in a lineman’s hut just on the outskirts of the village. In the dark, the Poles and Communists battled with bayonets, rifle butts, sabers, and fists. Just after midnight on 18 August, 1920, the hut was overrun, and the last of Polish defenders were dead, or had escaped. The seriously wounded Zajączkowski killed himself rather than be captured and endure the inevitable torture and execution at the hands of the Communists. Of the Zajączkowski’s original 500 men who attacked Zadwórze that morning, only 12 reached Lwów.

The 11 hour battle for Zadwórze consumed the entire 6th Cavalry Division, and held up the advance of the Konarmiya toward Lwów for more than a day. Zajączkowski’s stand gave time for the Polish defense of the city. Not only was Lwów saved, the Budyonny became fixed in front of the city, and could not extricate the Konarmiya quickly enough to ride northwest to affect the decisive Battle of Warsaw.

The Battle of Zadwórze was nicknamed “The Polish Thermopylae” after the Greek stand against the Persians 2400 years before.

(The Poles seem to have an obsession for the Greek Battle of Thermopylae. Zadwórze is one of at least six battles throughout Polish history known as “The Polish Thermopylae”)