The Battle of Culloden

In 1688, the Dutch Protestant Prince William of Orange, the husband of Britain’s Princess Mary, overthrew her father King James II (James VII in Scotland) the Stuart Catholic King of Great Britain to protect Protestantism. William and Mary became king and queen, and James fled to France with his family. His supporters still in Scotland and England were known as “Jacobites”, for the latin term for James, “Jacobus”, and they opposed the “Williamites” better known as “Whigs”. For the next sixty years, the Jacobites periodically but unsuccessfully revolted in the name of James II, or his son James Francis Edward Stuart aka “The Old Pretender” with the support of the French Catholic monarchs, most notably Louis XIV. In 1720, after nearly forty years in exile across Europe, the Old Pretender had a son, Charles Edward Stuart, unsurprisingly nicknamed “The Young Pretender” but better known in history as “Bonnie” Prince Charlie. (Get all that?)

In 1745, the tall and charismatic, not to mention dead sexy, Bonnie Prince Charlie landed in Scotland and raised the flag of rebellion in his father’s name. But a storm off the Scottish coast scattered his French fleet, and he landed with just 70 men, not an auspicious start. Still, the highland clans flocked to his banner, but most lowland clans and English Jacobite’s did not, because of his perceived weakness. Nonetheless, for eight months the insurgency defeated every “redcoat” army sent against them, and invaded England. However, the support wasn’t there to seize London and Charlie fell for an elaborate ruse of a fake army blocking his path, so the Jacobites returned to Scotland to fight the next redcoat army on their own terms.

The fake British army that was still being assembled in 1745, invaded Scotland in March 1746 under the King George II’s obese little brother the Duke of Cumberland. Cumberland had a large 9000 man army versus the Charlie’s’ 5000. On 15 April, Cumberland stopped to celebrate his 25th birthday and Charlie decided on a surprise night attack on the celebrating camp. After an overly ambitious night march, Bonnie Prince Charlie realized that his stumbling army wouldn’t make it in time and stopped famished and fatigued at the boggy Culloden Moor. Bonnie Prince Charlie, against the advice of the clan commanders, awaited an attack.

Cumberland didn’t look the part, but he was a ruthless trainer of men. He drilled his soldiers so much in the basics, that he increased their musket rate of fire from two rounds a minute to three, and cannon from one to two, a significant increase in firepower. Instead of charging, Cumberland bombarded the Scots to devastating effect. The Scots, armed in the traditional manner of broadsword and targe (small round shield) with few muskets or cannon, stood there and took it, losing nearly 800 men as Charlie hesitated. After thirty minutes, Bonnie Prince Charlie finally ordered an assault, but the feared, and up to this moment usually successful, “Highland Charge” was not enough to overcome the British firepower advantage. At 400 paces round shot sent columns of torn bodies through the Scottish ranks. At 100 paces, condensed and rapid musketry piled the bodies up as the Scots clamored over. At sixty paces, grapeshot turned men into red mist. At three paces, the disciplined redcoats bayoneted, not the man in front of them, but the man to his right, which avoided the targe. The single breakthrough was easily contained by Cumberland’s second line. 1100 more Scots died in the charge.

As the broken Scots fell back, the British army advanced and bayoneted the wounded, and dragoons chased down and ran through another thousand. Bonnie Prince Charlie escaped and the ten month chase is the stuff of legends, but in the process Cumberland killed any man he found with a musket or broadsword, or even suspected of rebel tendencies. The Jacobite resistance was broken forever and thousands of Scots fled or were banished to Ireland and the Thirteen Colonies. The Battle of Culloden was the last major land battle on British soil, and has left an indelible mark on the Scottish consciousness.

Greece is Doomed

On 8 April 1941, the German 6th Mountain Division cracked the Metaxas Line in the most unlikely of places: the extremely mountainous far west of the line, after scaling the twin heights of Demir Kapou and Kale Bair. Both mountains were over 7000 ft (twice the height of Riva Ridge) and thought by the Greeks to be insurmountable. Nonetheless, the feat was almost in vain as just west, the 2nd Panzer Division blew through Yugoslavia and raced near unopposed toward Thessalonica. To the northwest, the advanced guard of the 1st SS Leibstandarte Adolf Hitler Brigade, Hitler’s elite bodyguard, entered the northern end of the Monastir Pass, whose southern exit outflanked Gen Maitland Wilson’s Force W along the Halciamon Line.

Wilson knew of the German advances in near real time due to Ultra intelligence intercepts but couldn’t convince the Greeks to retreat. He couldn’t compromise the nature of his information, and in any case the Greeks were experiencing great success on the eastern end of the Metaxas Line, and were unwilling to disengage from a “winning” battle. Wilson dispatched an Australian brigade group to the southern end of the Monastir Gap, but even by force marching they barely made it there in time. Wilson essentially sacrificed them to save the rest of Force W. Wilson was only able to stay ahead of the Germans due to his Ultra intelligence. Force W, and any Greeks nearby, retreated first to the Mt Olympus Line, and then to the Thermopylae Line further south. But both would be outflanked, and two more brigades, Kiwis these times, would be sacrificed to slow down the advance so the rest of Force W could evacuate to Crete.

The Iraqi Coup d’état

Even the brilliant victory off Cape Matapan couldn’t salvage Great Britain’s foreign policy in Balkans, Mid East, and Eastern Mediterranean. The Greek government was in chaos after the unexpected death of Ioannis Metaxas. Prince Paul of Yugoslavia was the personal guest of Adolf Hitler at the Eagle’s Nest and signed Tripartite Pact. German troops were openly preparing for the Invasion of Greece, and Gen Archibald Wavell, the CinC MidEast was already making plans to evacuate the British expeditionary force there. And even worse, Turkey, watching the complete rout of O’Conner’s troops in Libya (O’Conner was captured by Rommel on 4 April) was leaning dangerously towards siding with Germany, as they had 25 years before. Turkey was no longer “The Sick Man of Europe” and its large and professional army would spell disaster for the British in the Middle East. And unlike the First World War, there would be no “Arab uprising” by new Lawrences of Arabia. As it was, the British could barely contain the pro German and pro Italian sympathies of many Arabs, particularly in Iraq.

In 1932, the Kingdom of Iraq was granted independence but as part of the treaty Britain retained some petroleum, passage, and basing rights. However as 80% of the British Empire’s oil came from Iraq, Persia (Iran), and Kuwait, British diplomats continued to meddle in Iraqi affairs. On 1 April 1941, Rashid Ali, a former pro German prime minister, led a coup with the four top Iraqi army and air force generals aka “The Golden Square”, against the pro-British monarchy. The Prince Regent fled to the RAF airbase at Habbaniyah, halfway between the towns of Ramadi and Fallujah. Over the next few days, Rashid Ali had all pro-British supporters arrested and formed the National Defense Government. Wavell could nothing to stop the coup: he had but a single battalion in Mandate Palestine, and a reinforced battalion defending RAF Habbaniyah. All four divisions of the Royal Iraqi Army sided with Rashid.

Turkey was now surrounded on all sides by pro German countries: National Defense Iraq, a nominally pro German but neutral Persia, the Soviet Union, Bulgaria, and Vichy French Syria. Only Greece and the small British expeditionary force there remained as a symbol of Allied power in the area.

Introducing Connery, Sean Connery

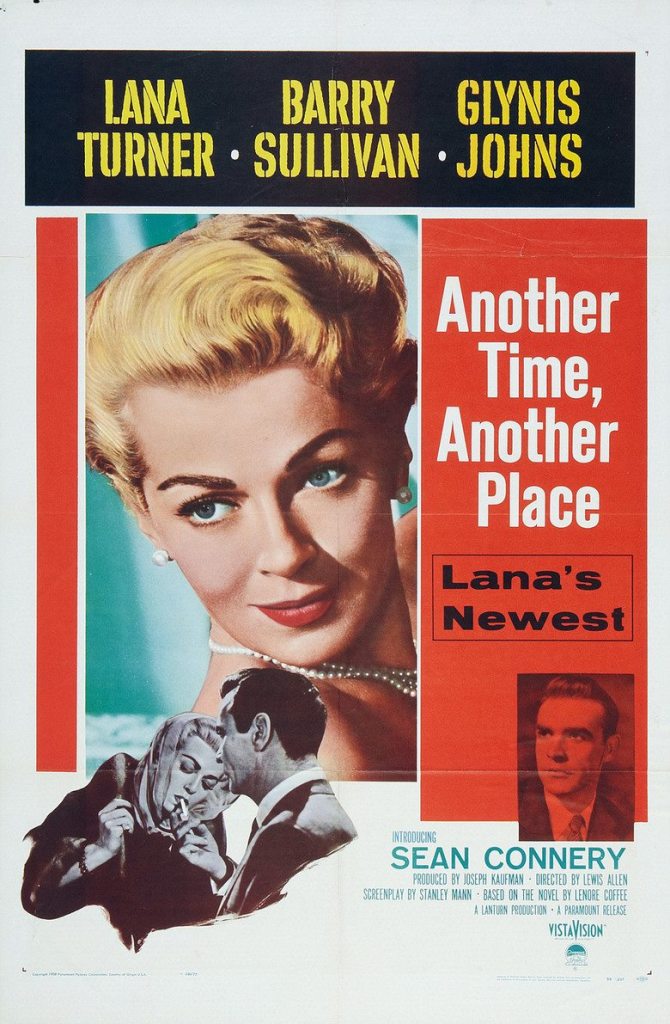
In the late 50s, vicious mob boss Johnny Stompanato owned L.A., and by extension, Hollywood. The stage crew, writers, and actors’ unions were all under his “protection”. Actress Lana Turner was trying to resurrect her career and turned to a relationship with Stompanato, but it was far from ideal. In March 1957, Turner was filming “Another Time, Another Place” with unknown 27 year old British actor, former Mr. Universe contestant, and male sexbot template, Sean Connery (OK, I made the last one up. It’s just not true…yet).

Stompanato, being the jealous type, wasn’t happy that Connery was poking Lana Turner (because of course he was) so one day thought to intimidate him. Stompanato showed up on set waving a revolver around and started yelling at Connery. Connery, unimpressed, disarmed Stompanato, pistol whipped him, and beat him to a bloody pulp right there on the set.

Sean Connery just gave a beating to the most powerful man on the west coast. There could be only one result: Sean Connery had to die.

Sometime later, Stomapanato vowed to sneak into Connery’s hotel and murder him, as he had done to others a dozen times before. He was just waiting for dark. But that evening, on 4 April 1958, Lana Turner came home from filming, and Stompanato proceeded to beat her, as he was wont to do. The beating was so vicious, that Turner’s 12 year old daughter, Cheryl, ran into the kitchen, grabbed a knife, and stabbed Stompanato… 12 times, killing him.

Another Time, Another Place released in June and featured credits with “Introducing Sean Connery” as opposed to “Dedicated to…”

Almost exactly three years later, archetypical English gentleman and actor David Niven, by far the favorite, lost the spot for the new role of James Bond to his only real competition: a still nearly unknown Sean Connery.

The Battle of Cape Matapan

In late March 1941, the British had the better part of three divisions in Greece and Crete, and supplying them required a steady stream of convoys from Egypt. Italian intelligence accessed that the British had just one battleship and no carriers in the Eastern Mediterranean, so Mussolini launched the pride of the Italian Navy, the ultra-modern battleship Vittorio Veneto (it was less than a year old), eight cruisers, and seventeen destroyers to raid convoys bound for Greece.

Italian intelligence was sorely mistaken. Admiral Cunnigham, the CinC of the British Mediterranean Fleet was reinforced by the ships that cleared the Gulf of Aden and the Red Sea of Axis ships in February. He had three battleships, an aircraft carrier, seven cruisers, and seventeen destroyers, centered around his flagship, the First World War veteran HMS Warspite. Nevertheless, the Italian ships were faster, stronger, more heavily armed, and more modern. However, British intelligence could read the Italian enigma transmissions and knew exactly when the first raid would take place. Cunningham needed to get the Italians close, before the Vittorio Veneto’s higher speed, longer range and better fire control smashed the older British battlewagons.

Using a destroyer squadron as bait, Cunningham ambushed the Italians in the dark seas off of the tip of southern Greece’s Cape Matapan on 28 March 1941. All day Cunningham played a game of cat and mouse with the Italians with his destroyers and Swordfish torpedo planes. With the Italians suitably disorganized by dusk, and the VV slowed by multiple torpedo hits, Cunningham closed in for the kill that night. During the night fighting at point blank range the Italians’ more modern ships mattered little. Fearing the loss of the pride of Fascist Italy, the Italians broke off the fight before the heavily damaged Vittorio Veneto was sunk. The Italians lost three cruisers, three destroyers and nearly 2400 sailors. The British lost three sailors killed and two near obsolete torpedo bombers shot down.

For the rest of the war, the Mediterranean Sea was a British lake, especially with Malta still in Allied hands. Only with great difficulty and massive German air support could Rommel be supplied in North Africa.

Rommel Attacks

By the third week of March, 1941, LtGen Richard O’Connor’s Western Desert Force had just two understrength divisions, the 9th Australian Infantry Division and the British 2nd Armoured Division (half of whose tanks were Italian). Churchill had withdrawn four divisions and sent them to reinforce Greece for the inevitable German attack. Gen Wavell, the British CinC Middle East, reluctantly agreed because he thought that the German forces arriving in Libya would be in no condition to attack before May. By then, he would have the tanks and planes in the “Tiger” Convoy which would completely refit the British 7th Armored Division (pulled back to Egypt), reinforce the RAF and infantry divisions, and modernize the ad hoc Polish and Free French units under his command.

But the commander of the German Afrika Korps, GeneralLeutnant Erwin Rommel didn’t wait for the entire corps to arrive. He formed the 5th Light “Afrika” Division around the newly arrived 5th Panzer Regiment and its supporting units and reorganized four Italian Divisions, the Bresca and Pavia Inf Divisions, the Trieste Motorized Div, and the Arieta Armoured Division. At 0600 24 March 1941 the fast eight wheeled Panzerspahwagens (armored cars) of the 5th Light raided the rear areas of the 2nd Armoured Division to open the offensive. Later that morning Rommel Attacks! (hehe) with all five divisions and seized El Alghelia that night.

The stunned British retreated to Benghazi and Rommel dogged them the entire way. He captured Ajedabia on 2 April, and audaciously split the Afrika Korps into three columns to out flank the British and Commonwealth forces (which ironically was exactly what O’Connor did two months before during Operation Compass, just from the east). One column continued up the coast road to Benghazi, one across the Cyrenaican plateau to Derna, and another across the base of the Cyrenaican Hump to Tobruk. When Rommel arrived outside Tobruk on 11 April, the British had barely escaped the trap, and then only by retreating along the coast road as fast as possible, ditching or destroying much needed supplies and equipment along the way.

Rommel wrote his wife,

“Dearest Lu,

We’ve been attacking since the 31st with dazzling success. I took the rise against all orders and instructions because the opportunity seemed favorable. The British are falling over each other to get away. Our casualties are small and our booty can’t be estimated. You have to understand: I can’t sleep for happiness…”

The Great Escape

By 1944, thousands of Allied airmen had been shot down and captured by the Germans. But even in captivity, it was the duty of every officer to attempt to escape in order to tie down German resources to guard the prisoners. By late 1942, troublesome prisoners with multiple escape attempts were sent to Stalag Luft III (Air Prison 3) which was deemed “escape proof” by the Lufwaffe.

But what the Germans really did was place every escape artist on continental Europe in the same camp. Led by British Squadron Leader Roger Bushnell, the camp formed an escape committee that spearheaded an effort to breakout hundreds of prisoners in a single night.

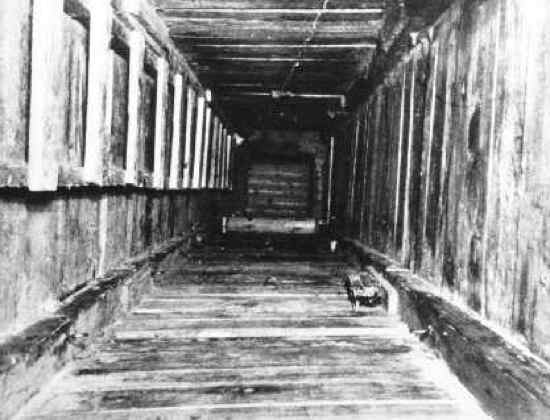
The planning and preparation effort for such an endeavor was huge and would take over a year. Every prisoner had to be given a disguise, travel documents, a fake ID, maps, compass, and enough survival gear to get them to a friendly or neutral country. All the while avoiding German and other occupying authorities. All of which had to be manufactured in secret under the noses of the camp guards. The biggest problem however was getting out of the camp. To effect this, four tunnels were dug, code named “Tom”, “Dick”, “Harry” and “George”. Preparations for the mass breakout continued throughout 1943 and into 1944.

By winter in early 1944, three of the tunnels had been abandoned and all efforts put into “Harry”. On the moonless night of 24 Mar 1944, 200 prisoners of Stalag Luft III were waiting their turn to travel through the 104m long tunnel from the camp to the woods beyond. But the tunnel wasn’t long enough and when the first escapee broke through the earth, he found he was 3m short of the wood line and very near the route of a German roving guard. A signal system was set up to avoid the guard but the throughput of Harry was seriously diminished. Not all 200 would make it out that night. The decision was made to go ahead anyway.

76 prisoners escaped that night in the largest breakout in World War 2. The Great Escape caused chaos across occupied Europe as tens of thousands of German and Axis troops attempted to track down the fugitives. 73 of the 76 were eventually recaptured. Hitler was so incensed by the breakout that he personally ordered the first 50 killed by the Gestapo. The other 23 were returned to the camp alive. Only three would actually make it to safety. One made it to neutral Spain via the French Resistance and two stowed away on a ship bound for neutral Sweden.

The Battle of the Atlantic: Seesaw

At no point during World War Two were the fluctuating fortunes of both the Allies and the Axis in the Battle of the Atlantic so fully on display as the first two weeks of March 1941.

-26 February: Battlecruisers Scharnhorst and Gneisenau broke out into the Atlantic. They sink 22 ships around the Azores and Cape Verde Islands and returned on 14 Mar.

-1 March German pocket battleship Admiral Sheer broke out into South Atlantic, sinks six ships, returned on 27 March.

-2 March: U Boat wolfpack savaged fast Convoy HX-109. Convoy was found due to German expertise in radio signal direction finding which each U-boat was equipped. In all, 83 ships were sunk by U boats over these three weeks, an above average total.

-4 March: Operation Claymore. The first large scale commando raid of the war. Commandos raided the fish oil and glycerin factories of the Norwegian Loften Islands. Wildly successful, but even more so because the commandos captured four rotors of a German enigma machine which would allow the British to decode German naval signals traffic.

-6 March: In a reaction to estimates from the Home Office that Great Britain had just five months of essential supplies left, even with severe rationing, Winston Churchill issued guidance that the Battle of the Atlantic was the top priority of the British and Commonwealth armed forces.

-7 March: Germany’s #3 U boat captain and hero of the raid on Scapa Flow, Gunther Prien, was killed when his U boat was sunk in an attack on convoy OB-293.

-7 March: 12 German E- boats (PT boats) nearly destroyed convoys FN-426 and FS-429 off the English coast.

-11 March: the German cruiser Admiral Hipper sank 14 of 19 freighters in convoy HG-43 off the African coast near Sierra Leone.

-11 March: Lend-Lease.

-12 March: RAF bombers severely damaged the FW-220 factories near Bremen, and due to bureaucratic infighting they never recovered. The FW-220 “Condor” was Germany’s only four engine bomber. Allied convoys feared the big long range converted passenger plane because a sighting of one inevitably meant one or two sunk ships from bombs, and a wolfpack attack within 24 hours.

14 March: German auxiliary cruiser Atlantis sank or captured four ships in the south Atlantic. In all, the Atlantis and her sister ships, the most famous of whom were the Komoran and Pinguin, sank or captured 14 ships in these two weeks.

16 March: the German’s #1 and #2 U boat captains, Otto Ketchmer and Jochim Scepke were both killed separate wolfpack attacks in the North Atlantic. Scepke’s U-100 was the first U-boat lost while tracked by radar.

-16 March: German battleship Bismarck and cruiser Prinz Eugen began sea trials in the Baltic.

Lend Lease

US President Franklin D. Roosevelt recognized the global threat from National Socialist Germany and Imperial Japan long before most of America. Despite strong bipartisan isolationism in Congress (not to mention German –American was the largest ethnicity in America at the time), FDR managed to conclude the Destroyers for Bases Agreement on 2 Sept 1940 in which 50 near obsolete “four stacker” Wilkes and Clemson class destroyers were given to Great Britain for 99 year leases of British bases in the Caribbean and New Foundland. After securing victory in the 1940 election, FDR announced that the US would become the “Arsenal of Democracy” on 2 December 1940 with the knowledge that numerous secret State and War Department studies concluded that Great Britain after the Fall of France was “doomed without full economic and financial support from the United States”.

That winter, stories from the Luftwaffe Blitz and U boats in the North Atlantic shifted public opinion in the US. On 11 March 1941, Congress passed the Lend Lease Act and FDR signed it into law the same day. The Lend Lease Act provided military supplies to Great Britain, Free France, and other countries fighting Germany without “cash up front” for additional leases on Allied bases, most notably Danish Iceland. This was in direct contradiction to the Neutrality Acts which dominated US foreign policy for over a decade.

The Lend Lease Act would eventually provide over a quarter of Great Britain’s and the Commonwealth’s military supplies. In the short term it provided Canada with the ability to take over the convoy escort duties in the Western Atlantic (Canada by the end of the war would have the 3rd largest navy in the world after the US and GB). Additionally, the US would provide escorts for convoys in American territorial waters, an area that FDR would continue to extend farther and farther away from any American coast. Lend Lease dropped any pretense that America was going to stay neutral in the war in Europe.

The Battle of Camp A Shau

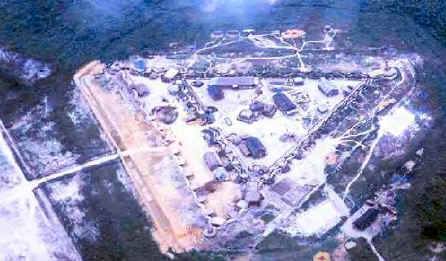
Camp A Shau was the last of three US Special Forces camps in the strategically important A Shau Valley in South Vietnam. Just two miles from the Laotian border, Camp A Shau sat astride a juncture in the Ho Chi Minh Trail where supplies could continue south, or enter infiltration routes to the cities of Da Nang and Hue, both thirty miles away.

On the morning of 9 March, 1966, four communist regular North Vietnamese Army battalions of 2000 men attacked the camp defended by 17 Americans, 40 Nung mercenaries, and 400 Vietnamese and Montagnard militiamen of the Civilian Irregular Defense Group (CIDG).The communists took part of the camp the first night but the battle raged for the next 36 hours. On the night of 10 March, out of ammunition and water, with staggering loses among the air support, the camp was ordered abandoned. A squadron of US Marine Sikorsky H-34s, HMM-163, flew through what they called “The Tube” in an attempt to evacuate the camp.

In addition to withering fire from all angles, including above, the evacuation proved more difficult than expected. Discipline broke down as the helicopters approached. Many of the Vietnamese switched sides or, with the Montagnards, tried to swarm the helicopters as they landed. Unable to take off because of the weight of soldiers hanging off of the birds, crew chiefs and green berets had to resort to shooting the hangers-on, after yelling and beating didn’t work. In the chaos, this resulted in full-fledged gun battles inside some helicopters, a breakdown in the defense as the NVA surged onto the landing zone, and some special forces leading a breakout into the jungle to escape.

The next day, the squadron conducted a series of search and rescue missions looking for survivors. Over half the garrison was killed or turned, and all but three of HMM-163’s helicopters were either shot down or too damaged to fix. The NVA would turn the A Shau valley into one of its major logistics and staging areas, and over the next four years the US would launch increasingly large operations to clear the valley, culminating with the Battle of Hill 937, aka Hamburger Hill.